Serengeti Photography Tips
Field-craft photography tips for the Serengeti — shooting in golden light, working from a private vehicle, stabilising on a bean bag, managing dust, framing river crossings and the cats, and doing it all ethically.

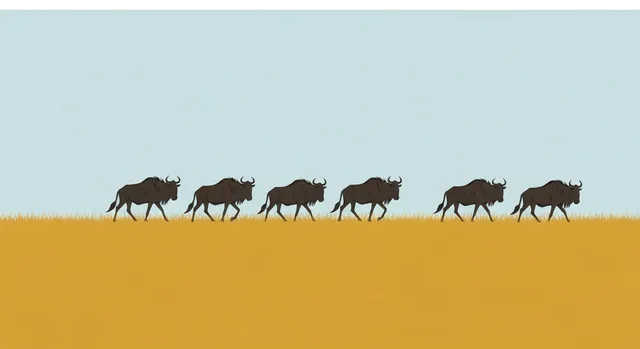
Photo: Heather M. Edwards / Unsplash
- ✓Shoot the edges of the day: the golden hours at dawn and dusk give the light, the colour and the active wildlife — the harsh midday is for resting, not shooting.
- ✓Get low and steady: drop to eye level with your subject and rest a long lens on a bean bag draped over the door or roof — it is the cheapest, most important upgrade you can make.
- ✓A private vehicle is the real game-changer: it lets you control your angle to the light, stay with a sighting through the dead time, and own the dawn and dusk hours.
- ✓Manage dust and timing in the field: keep gear in sealed bags, change lenses sparingly, and pre-set exposure for fast, unpredictable action like a river crossing.
- ✓Ethics frame every frame: keep your distance, never crowd or block a hunting cat, follow the park rules, and verify access and migration timing for your dates.
When is the best light for Serengeti photography?
The Serengeti gives photographers its finest light in the first and last hour of daylight, and almost nothing matters more than building your day around those windows. At dawn the sun rakes low across the plains, turning dust into gold, rimming a lion's mane with light, and casting the long, soft shadows that give an image depth. The same magic returns in the last hour before sunset. Crucially, these golden hours are also when the wildlife is most active — the cats hunt in the cool, the herds move — so the best light and the best action arrive together. The lesson is to be out in the field before the sun is up, not driving towards your subject as the light hardens, and to be back out well before sunset rather than heading in for an early dinner.
The harsh, high midday sun is the photographer's enemy: it flattens colour, blows out highlights, casts ugly shadows under the eyes, and coincides with the hours the cats spend flat in the shade. Treat the middle of the day as time to rest, back up your cards and clean your gear — unless there is genuine action worth shooting through it. This rhythm is why a camp placed close to the wildlife, and the freedom of a full-day drive with meals in the field, matter so much: they keep you in the golden light instead of spending it in transit. The green season, roughly the short rains of November and the longer rains of April and May, adds dramatic skies and saturated colour to that low light, while the dry season delivers cleaner air and concentrated wildlife — choose the season for the images you want.
At a glance
A quick checklist of the field-craft choices that change your keeper rate most.
- Light: shoot dawn and dusk; rest or clean gear through the harsh midday.
- Angle: get low — eye level with wildlife reads as intimacy; shooting down flattens it.
- Stability: a bean bag on the door or roof beats handholding a long lens every time.
- Vehicle: a private vehicle to control angle, timing and patience.
- Settings: shoot fast shutter and burst mode for action; pre-set exposure before it starts.
- Dust: sealed bags, minimal lens changes, a blower and microfibre cloths.
- Ethics: keep your distance, never crowd a hunt, follow the park rules.
How do I get sharp shots from a safari vehicle?
Two things make safari images sharp, and neither is expensive. The first is angle: get as low as you can. A photograph taken at eye level with a lion or cheetah reads as intimacy and respect, drawing the viewer into the animal's world, while one shot down from a high window flattens the subject into the ground and looks like a snapshot. Drop your lens to the door line, shoot through an open side or a low window, and where the vehicle allows, brace over the sill rather than down from the roof. The difference between a forgettable frame and a portfolio one is often just a metre of height.
The second is stability, and the single most important accessory in the Serengeti is the humble bean bag. A long lens handheld from a vehicle — even a stationary one with the engine off, which you should always insist on at a sighting — produces soft frames at the focal lengths wildlife demands. A bean bag draped over the open door or roof hatch gives you a stable, swivelling rest that turns marginal light into pin-sharp images and lets you track a moving cat smoothly. Some specialist photographic vehicles and camps provide them; many do not, so ask in advance, and consider bringing an empty bag to fill with beans or rice on arrival rather than flying with the weight. Beyond the bean bag, use a fast enough shutter speed to freeze movement, switch on continuous autofocus and burst mode for action, and keep a second body with a wider lens ready so you are not changing glass when the moment comes.
- Get low: shoot at the animal's eye level, not down from a high window.
- Bean bag: rest the lens on the door or roof — bring an empty bag to fill on arrival if needed.
- Engine off: always ask your guide to cut the engine at a sighting to kill vibration.
- Settings: fast shutter, continuous autofocus and burst mode for unpredictable action.
Why does a private vehicle matter so much for photography?
For a photographer, a private vehicle is close to non-negotiable, because wildlife photography is mostly patience punctuated by seconds of action — and patience is exactly what a shared vehicle cannot give you. On a group drive you photograph to someone else's schedule: the vehicle leaves when others tire, moves on when the consensus moves, and stops where the group stops. A cheetah you would happily wait an hour for, until it rises and hunts in the cool of the evening, is abandoned because someone wants lunch. A private vehicle hands that time back to you. You can sit with a sighting through the dead minutes until it ignites, head out before first light and stay until the last, and follow your guide's hunch across the plain rather than a fixed loop.
Just as important, a private vehicle lets you control the one thing no lens can buy: your angle to the light. Front-light, side-light and back-light each tell a completely different story, and the gap between a snapshot and a strong frame is often just the freedom to move the vehicle five metres so the sun falls right or the background cleans up. You can reposition again and again, put a kopje or a clean horizon behind your subject, and chase the rim-light of a back-lit cheetah at dawn. If a fully private vehicle is beyond budget, the next best things are a small camp with a low guest-to-vehicle ratio or a dedicated photographic departure where everyone on board shares your priorities — but confirm the vehicle policy in writing before you book, because 'shared on a rotation' and 'private throughout' are very different trips.
- Patience: stay with a sighting until the action comes, on your schedule not the group's.
- Angle: reposition freely to control front-, side- and back-light and clean up backgrounds.
- Hours: own the dawn and dusk windows instead of a fixed group itinerary.
- If budget is tight: a small camp with a low guest-to-vehicle ratio, or a photo departure.
How do I handle dust, and how do I shoot a river crossing?
Dust is the constant companion of a Serengeti safari, especially in the dry season, and it is the main threat to your gear and your images. Keep cameras and lenses in a sealed, padded bag whenever you are moving, and only bring them out when you are working. Change lenses as little as possible, and when you must, do it inside the vehicle with your back to the wind and the body pointed down to keep dust off the sensor — every lens change in the open is an invitation for grit. Carry a blower, a soft brush and microfibre cloths, and clean gently in the field, leaving any serious sensor cleaning for home. A rain cover doubles as a dust cover and weighs almost nothing. Back up your memory cards every midday, because a corrupted card on a once-in-a-lifetime trip is heartbreaking.
The river crossing is the Serengeti's hardest and most rewarding photographic set piece, and it rewards preparation over reflexes. Crossings, when they happen, erupt without warning and end in a blur of dust, water and motion, so set up before it starts: pre-set a fast shutter speed to freeze the chaos, dial in your exposure for the bright water and dark animals, and switch to continuous autofocus and your highest frame rate. Decide your shot in advance — do you want a tight portrait of a single wildebeest mid-leap, or a wide frame of the whole churning column against the dust? Have both a long lens and a wider one ready on two bodies if you can, because the action shifts distance fast. And then accept the most important truth of all: no crossing can be scheduled. Give yourself several nights in the north during the dry-season window, travel with a patient guide, and treat the waiting as part of the experience rather than a failure of timing. Treat any migration timing as a long-run average and verify it for your exact dates.
- Sealed bags between sightings; change lenses sparingly, inside the vehicle, out of the wind.
- Carry a blower, brush, microfibre cloths and a rain cover that doubles for dust.
- Back up your cards every midday — never trust a single copy on a trip like this.
- Crossings: pre-set fast shutter, exposure and burst mode; decide tight or wide in advance.
- No crossing is scheduled — give yourself several nights and verify timing for your dates.

How do I photograph the Serengeti ethically?
No photograph is worth harming the subject, and the ethics of wildlife photography are not an afterthought — they shape both the morality and, often, the quality of your images. A hunting cat operates on a knife-edge of energy, and a vehicle that crowds it, cuts off its chase or alerts its prey can wreck a hunt the animal needs to survive. So keep a respectful distance, never drive between a predator and its prey, never surround or box in an animal for a closer frame, and never pressure your guide to break the park rules or go off-road where it is restricted. The Serengeti's regulations exist precisely to protect the wildlife you came to photograph, and the best operators follow them without being asked.
There is a happy alignment here: ethical photography usually produces better pictures. The most magical, unhurried encounters are almost always the ones you have largely to yourself, away from the vehicle scrums of the central crush — in the north, on the eastern plains, in the quieter shoulder seasons. Switch off the engine, lower your voice, and let the scene unfold on the animal's terms; the relaxed, natural behaviour you capture as a result will always beat a stressed, crowded frame. Choose an operator with a genuine conservation ethic, tip the patience of a good guide, and remember that the privilege of photographing wild animals comes with the duty of leaving them entirely free. Because park rules, fees and access can change, verify the current rules and any seasonal restrictions, along with the migration timing for your dates, directly with your operator before you travel.
- Keep your distance; never crowd, surround or block a hunting predator.
- Respect off-road limits and never pressure a guide to break the park rules.
- Seek quieter sectors and seasons — relaxed animals make better, more natural frames.
- Verify current park rules and migration timing with your operator before you travel.

Related guides

Serengeti Photography Safari
How to plan a photo-first Serengeti safari — the vehicle and private guide that make or break your images, the lenses and light to plan for, and the seasons that put predators and crossings in front of your lens.
Read guide
Best Serengeti Camps for Photographers
How to choose a Serengeti camp if photography is the point of the trip — placement near the action, the right vehicle and bean-bag set-up, guides who think like photographers, and the logic of a private vehicle and the golden hours.
Read guide
Camera Gear for a Serengeti Safari
A practical packing guide to camera gear for a Serengeti safari — lenses and bodies, batteries and cards, the all-important bean bag, dust protection, your phone, binoculars and how to pack it all for strict light-aircraft limits.
Read guideMore in Wildlife
6
Big Cats in the Serengeti
A guide to the Serengeti's three great cats — lion, cheetah and leopard — where each is most likely, how their behaviour shapes a sighting, and why a patient vehicle and a good guide matter more than any guarantee.
Read guide
Birdwatching in the Serengeti
A traveller's guide to birding the Serengeti — the rollers, ostriches, raptors and wet-season migrants that fill the plains — and how to add birdwatching to a safari without losing the mammal focus.
Read guide
Black Rhino in the Serengeti
Honest expectations for seeing black rhino in the Serengeti — why sightings are rare, where the small protected population lives around the Moru Kopjes, and why the Ngorongoro Crater is often the better add-on for rhino.
Read guide
Buffalo in the Serengeti
Cape buffalo in the Serengeti — herd behaviour, the long rivalry with lions, why solitary old bulls demand respect, and why buffalo deserve more than a quick tick on the Big Five checklist.
Read guide
Crocodiles in the Serengeti
Where the Serengeti's Nile crocodiles live, the role they play in the Grumeti and Mara River crossings, and how to watch the drama responsibly — with honest, no-guarantee expectations.
Read guide
Elephants in the Serengeti
Where elephants are most likely in the Serengeti and how sightings vary by sector and season — the woodlands of the north and centre, the rivers and Lobo — and when Tarangire is the stronger elephant add-on.
Read guide